A roller curler allows the sail to roll and unroll around the stay to put away and deploy the sail. The previous owner had taken off the rollers and converted the sails all to hanks. The problem with that is it requires the crew to go forward to manage the headsails. On the other hand it's said one scarifies sail performance with furled sails, but one gains safety at sea.
I had just ordered a new stay sail so I called the local representative here Cliff from Lee Sails, and asked him to change the order to a furled stay sail over a banked on one as I had originally ordered. A battery of questions followed that I wasn't ready for from Cliff. These included:
- what is the make of the curler you plan to use?
- what luff tape do they recommend?
- what is the color of the UV protectant?
- which way does it roll up, CCW or CW?
- what is the stay diameter?
Well I hadn't bought the furler yet so I didn't know. I went through Practical Sailor's magazine and they rated the Harkin MKIV very high as a cruising rig. Harkin makes five different versions of the MKIV, so I wasn't certain which one to buy. I went to Columbia Marine Exchange to speak to Kim about which one to buy and why? Kim spoke to the guy at Harkin and they recommended the MKIV Unit 2. All looked good so I ordered it.
I went home and watched Charlotte Taylor's youtube video on the Harkin MKIV. (http://www.harken.com/productdetail.aspx?id=5466&taxid=547) In the video she says she had installed one herself with the help of a few friends. After reading the manual for it online, I thought we'd likely have the ability to do it ourselves.
By the first week in April I had emailed Cliff and given him all the details on the furling system I purchased and the intended rolling direction of the sail.
Two weeks after ordering the MKIV kit from Kim it arrived. I went through the box contents several times thinking I didn't have all the parts. There was no way to terminate the furler at the bottom of the stay, it just seemed wrong. Originally I wanted to keep the quick release on the staysail stay to make it movable with the furler on it. After asking around this turns out to be a bad idea because of the amount of tension needed to support the stay tension with the added weight. I called Harkin asking about this and the represented laughed and said no, that can't be done. I then asked about recommendations on termination of the system at the deck. The Harkin rep replied he couldn't help me and hung up. So much for the technical support for their products.
I received an email from Cliff two weeks ago saying the sail had come in. A week ago he delivered it to the boat.
I called "Fingers" Rhodes on Friday asking if he'd be interested in helping to install the sail and furler on Saturday.
We got to the boat about 10 am on Saturday. The first step was to lower the inner stay to the dock to install the MKIV. We set up a 6:1 purchase on a halyard with the other end on the boatswain chair. I lifted Kevin up to the clevis and pin of the stay to release it to the deck.

Once the stay was on the deck we used the cable cutters to cut off the Sta-lok terminal on the mast terminated side of the stay. Sta-lok terminals act by forced friction of a wedge inserted in he inner wired of the stay, then forced around the outer wire of the stay as it act upon a bolt containing the wedge.

Next the aluminum foils were pieced together over the stay joining them with inner plastic bushings with aluminum couplings. Two set screws hold the aluminum coupling together inside the foils. These screws are held in place by Loctite and epoxy that is applied between the two set screws on each side the a hole in the foil and troughs for the epoxy in the coupler. Soon all the pieces of the foil were together and we added the set terminal on the mast side. This set terminal was a capped bushing on the top of the foil. We backed off the eye on the lower side of the stay and ran the end through the halyard lift, and the roller spool.
By now it was 2:30pm and I took off to get lunch and a new turnbuckle from WestMarine. When I got to WestMarine I expressed my frustration with the Harkin lack of customer support. The WestMarine sales person was very surprised saying he'd always had good support from Harkin. The sales person at WestMarine took a look at the old Sta-Loc terminal we cut off and when through the Harkin catalogue to locate the right terminal part we needed for the lower stay. I purchased the new turnbuckle and lunch heading back to the boat.
Once back at the boat we installed the Sta-loc fittings, and the new turnbuckle. Next we attached a halyard to the stay and lifted it up to stay tang to fit the pin. Once again Kevin was hoisted up the mast to fit the pin.

Kevin was lowered again and we fitted the two alternating eye jaw toggles to the deck plate for the stay sail stay. On these two alternating eye jaw toggles we added the turnbuckle and lower the furler over it. Placing the staysail luff tape into the tracks on the foil we raised the staysail and attached the sheets. We then tied off the furling line on the drum, then hand wrapped the stay sail around the foil.
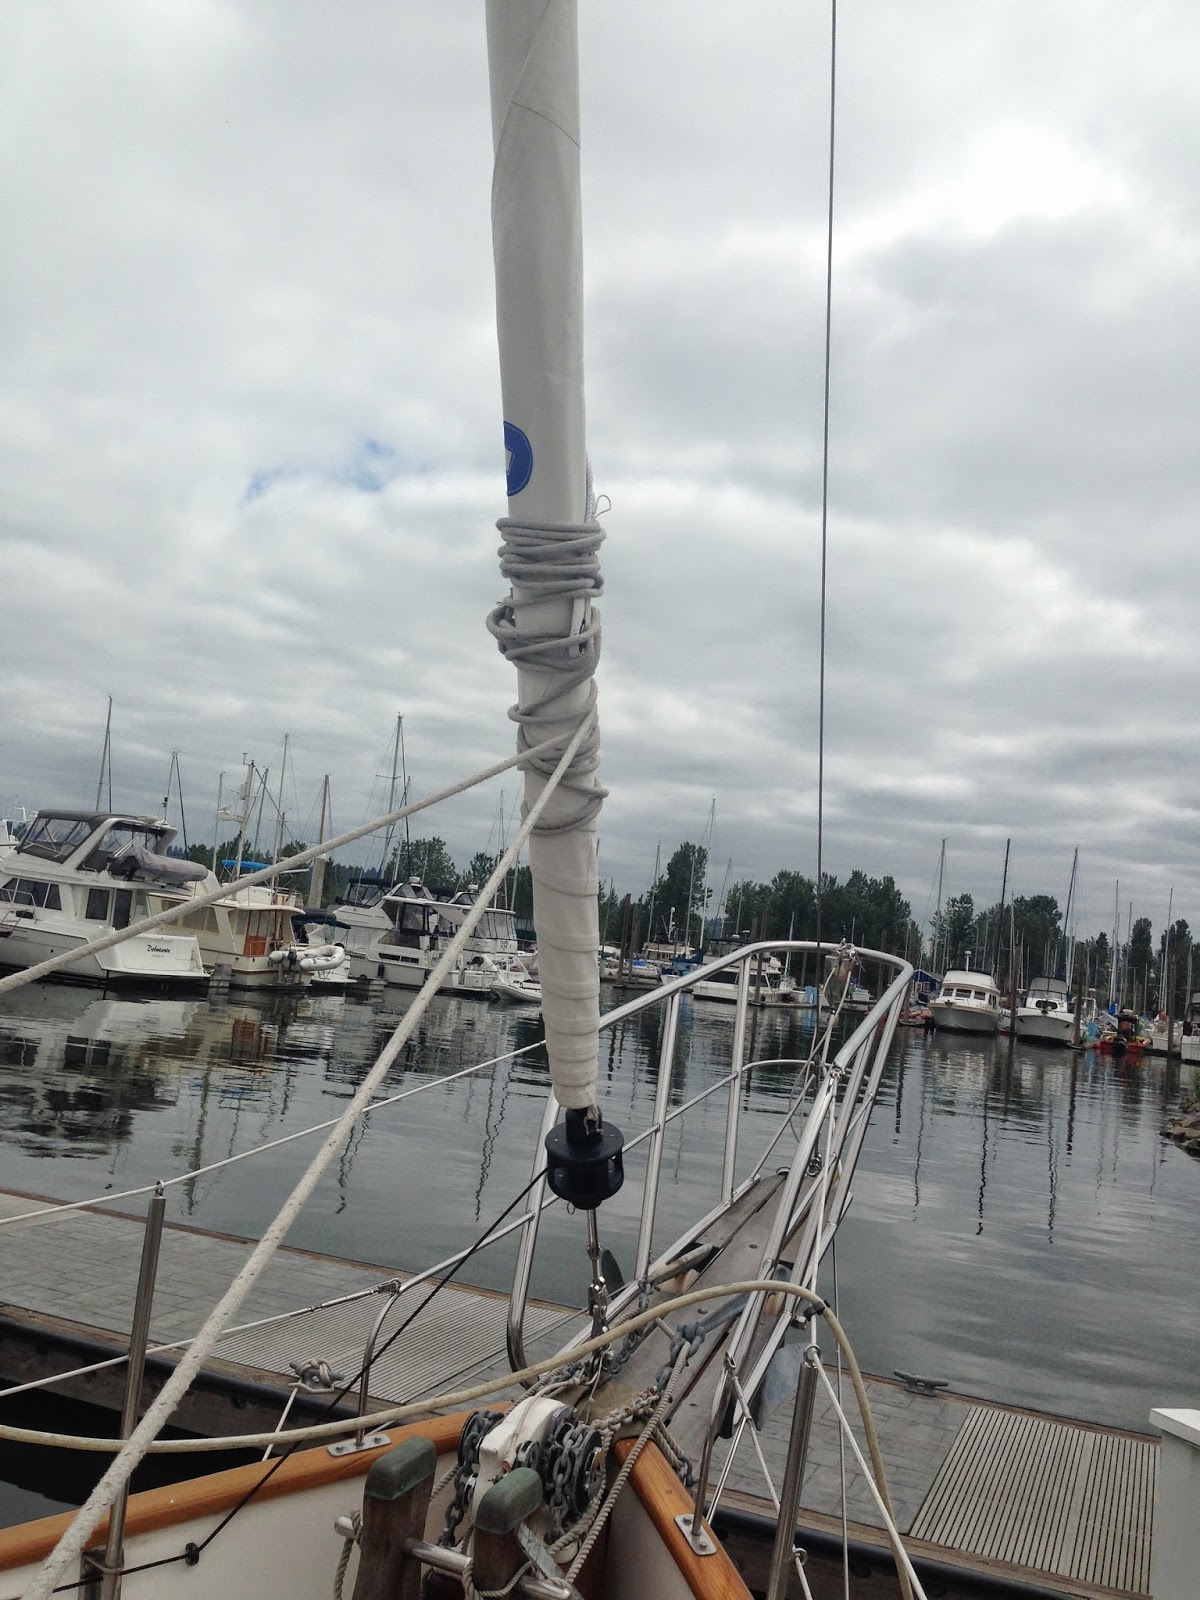


Next week when the final piece comes into WestMarine we will add it to the rig and the thing should work properly. Right now there a locking bolt holding the drum up off the turnbuckle waiting for the new part.
Many thanks to Kevin for sticking with it. We finally finished the work around 6:00pm taking us eight hours to put it all together.
No comments:
Post a Comment