Thursday, November 29, 2012

Hanging the picture....

Work continues on the Carol-Marie as sabbatical progresses. A good deal of small jobs were done, like hanging pictures, registering the boat, registering the EPRIB, etc.

We kept the painting from the NiSe's settee, and hung it in the pullman berth.


Tuesday, November 20, 2012

TV Installed

Today I installed the TV bracket and mounting on the backside of the rear cabin bulkhead.   It turned out pretty good.


I also washed down the decks, although the rain storms helped out a lot.


Thursday, November 15, 2012

Some more chores on the interior...

I found a 12V 32" flat screen TV for the interior.  It turns out the LG 32CS560 has a nice 12V connector that will fit well into boat's system.  The down side is the device draw 14W through it's power supply brick.  Hopefully the power brick is highly inefficient so it may draw less connected to the battery.  If not the device draws 1.1667Amps which isn't really bad.  A load resistance on the device is 10.28 Ohms.  Our house battery has a capacity of 180 Amp-hours, and the engine's bank another 140 Amp-hours.

The next step is to buy a swivel mount for the back, and mount it near the companion way.   The thought is we will be able to connect the navigation system to the device as well to use it as a chart plotter repeater screen.

A serendipitous event occurred when I turned on the TV the first time after tuning the channels, the first program that popped up was Hawaii 5-0.

Hawaii 5-0 on the new TV
It was serendipitous because the same day I sent over the registration for the USCG with our home port in Aiea, HI.

All the work wasn't as good when I broke the custom fitter AC-plug cover.  Two of the four AC outlets on the boat were missing their teak covers.  The one near the gas station needed customization because of the light mounted near it.  Charing made careful drawings of the outlet, and found a woodworker here locally to tailor one for us.  Of course the fit was perfect, but when I tried to tighten her down, the center collapsed and fractured.


Well, back to the drawing board.  Luckily I kept the drawings Charing made and may be able to get a new one made.

Sabbatical keeps going.....

Wednesday, November 14, 2012

Breaking down the sheaves.....

One of the next chores on the list was to break down, varnish, and grease the wooden sheaves on the running rigging.  Sheaves are the pulleys that help manage the sheets (ropes running from the sails to wenches).  For a classic look many boat owners buy the wooden sheaves; pulleys that have been encased in teak, or another hardwood.  When these wooden sheaves are varnished they are stunning.

Once I brought them home yesterday I had a hell of a time figuring out how to break them down or even if you could.  It literally took me about 10 hours of research on the net to find a wooden boat site that even talked about how to service them.

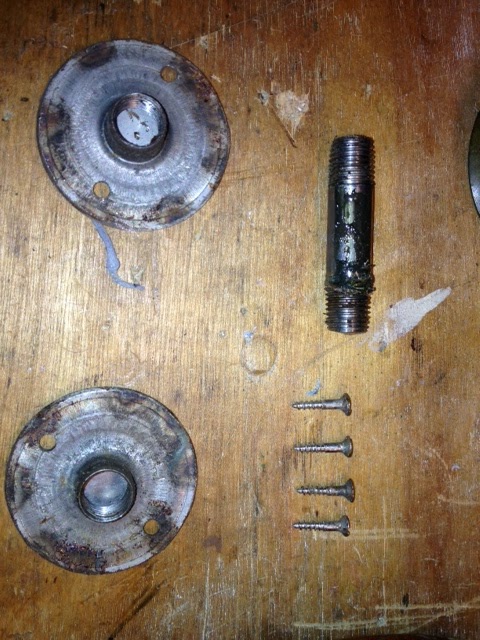
The basic components of them are the wooden block, pulley with bearings, two cap plates, a stainless steel loop, an axle, and four wood screws.

To break them down first remove the wood screws from the cap plates on both sides.   These cap plates are threaded on the axle.  To remove them I used needle nose pilers inserted into the holes for the screws to unscrew the cap plate on one side.  Once the cap plate on one side was removed I used a hammer and screw driver to tap out the axle.  The pulley was then extracted from the inside.  Above you see all the components.


The bearing and the axle were encrusted in salty grease, which I cleaned. Then sanded the wooden blocks, removing all the gray.  I washed the wood block in soap in water to remove all the dirt. Then began varnishing the block.   Each block requires 7 coats of varnish to have a lasting hard shell.  Once the varnish is dried I reassembled the first one, the work paid off; the sheave is functional and stunning to look at.