Monday, May 4, 2020

What happens 8 to 10 years later - three VHF handheld radios reviewed

While rummaging the drawers in the CarolMarie during the Covid-19 lockdown I found the three VHF handheld radios I bought between 2010 and 2012.  Each of the radios had the same features:


  • Waterproof and floats 
  • Rechargeable batteries
  • Hand held
  • Marine VHF and Weather 
  • 16/9 switch
  • Flexible antennas
  • Scanning channels
  • Optional mic and earpiece
The three radios were the West Marine Submergible VHF 150, Uniden Atlantis 200, and the Standard Horizon Floating HX290.  All three were kept in a bottom drawer near the floor of the cabin.  I decided to conduct a test which began with charging the three for 12 hours, followed by a operational volume test on a weather channel for 2 hours, finally a test of receive and transmit periodically on channel 16.  The third test criteria include the specification that the radio last for at least 8 hours which should cover a shift at sea.  


Right off the bat the West Marine VHF 150 failed the charging test.  Both sides of the charger connector suffered extreme corrosion.  Although trying to remove the corrosion there wasn't anything I could do bring the radio's charging station back to life.  The corrosion is shown in the photos below.


I brought the West Marine radio back to the house and removed the connectors on both sides, then directly soldered the charger to the internal charger stand's PCB.  The charger then worked without a problem.

The next test was to have both the Standard Horizon and Uniden radios charge for 12 hours.  Both radios were able to fully charge and showed a full battery level at the end of 12 hours.  

The two radios were then turned on and tuned to weather channel #2, and remained on for 2 hours at there highest volume.


The purpose for this test was to simulate a mariner listening to posts of incoming weather fronts which maybe hazardous while at sea.  Both radios performed well through the tests.  The signal was clear on both radios from beginning to end of the 2 hour period.  Despite being on for 2 hours neither radios battery indicator showed anything but a full charge.  Both radios were then placed back on their chargers for another 12 hour period before the next test began.

The next test was to monitor channel 16 for a full 8 hour shift with occasionally transmissions on channel 69.  The first four sentences of Moby Dick were readout on channel 69 on each radio every 30 minutes as part of test.  Then the radio was set back to channel 16 until the next 30 minute period was up.

At the end of the 8 hour test both the Standard Horizon and the Uniden continued to to work flawlessly and had plenty of power.  I was surprised because I thought with these older batteries neither would have the capacity left over, yet both did.  

I decided to continue the same testing procedure until one of the two radios failed to perform.  After 14 hours of total test time the Uniden Atlantis 200 had problems transmitting and failed the test.  You can see in the photo below the single battery bar left on the screen.  Shortly after taking the picture the unit stop working and was placed back on it's charger.
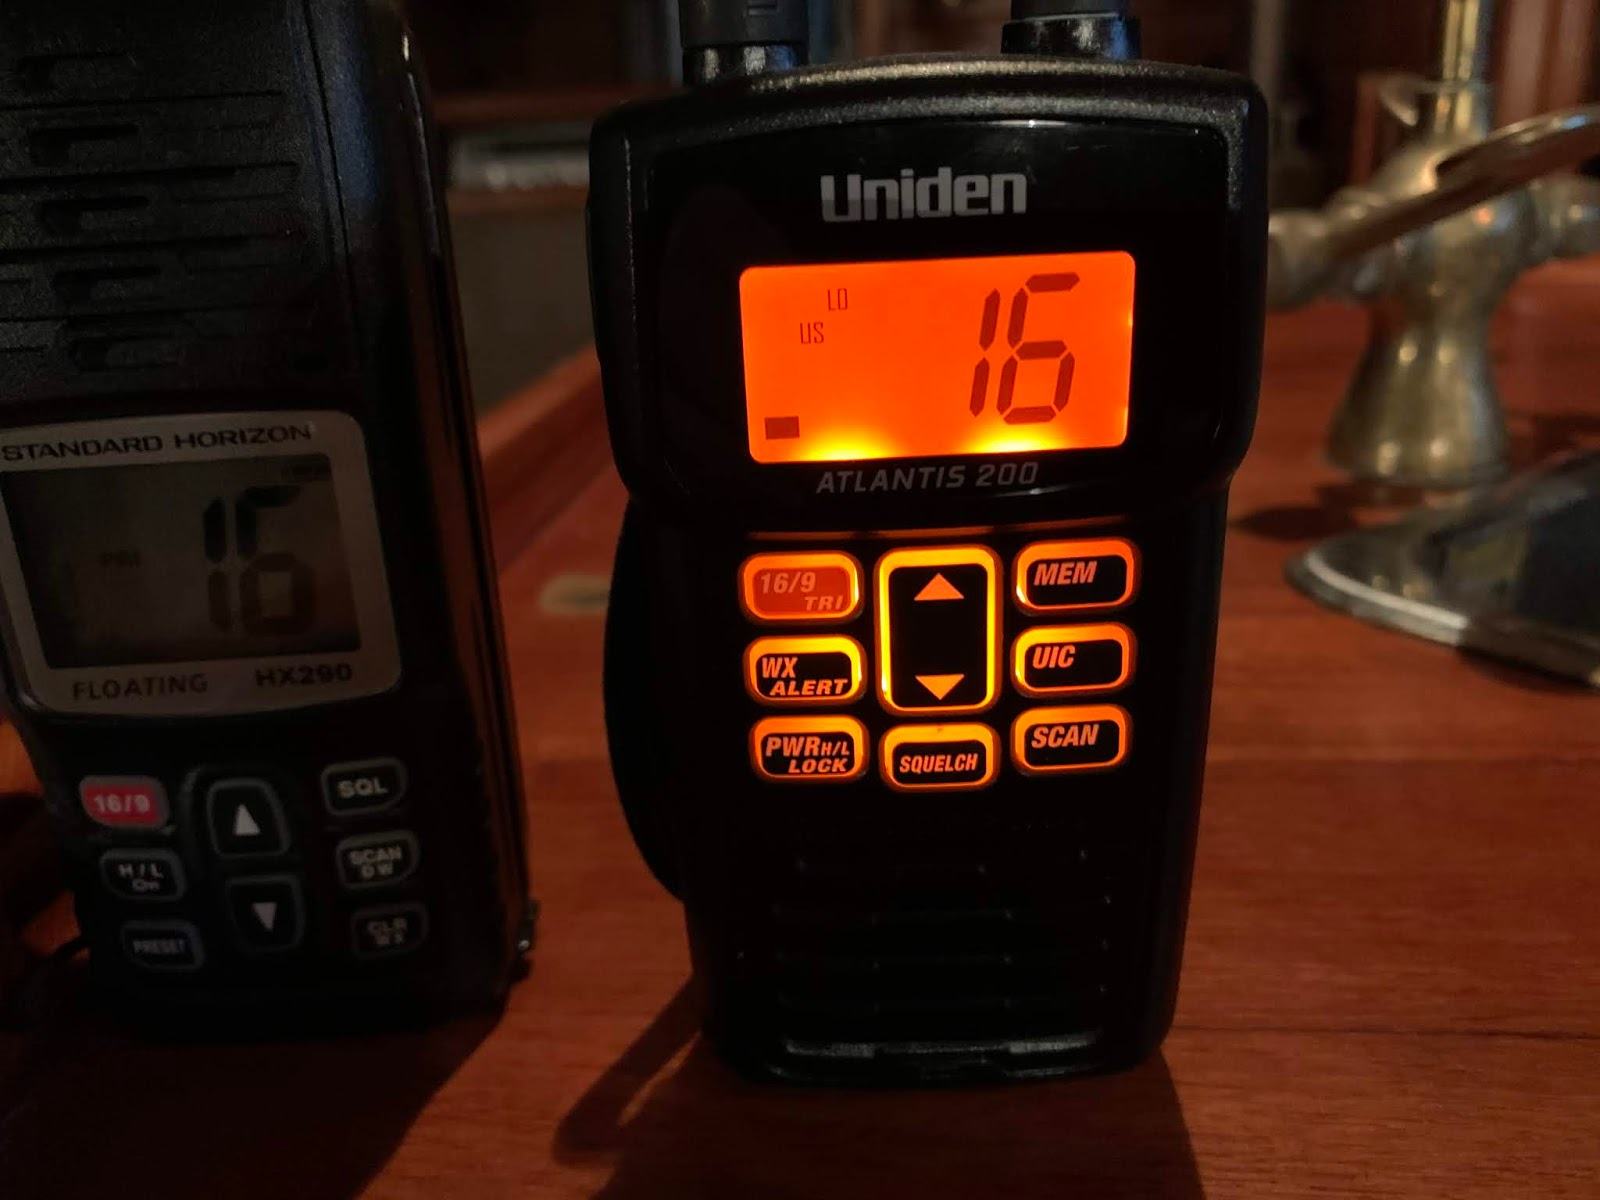


The Standard Horizon HX 290 continued to work for 22 continuous hours before failing to transmit.  With twice the battery capacity in mAH (milliamp hours) of there was no surprise the Standard Horizon outlasted the Uniden VHF.

So after 8 to 10 years the Standard Horizon HX 290 and the Uniden Atlantis 200 still performed as needed, and I will conduct the same test in another decade, stay tuned to see what holds up.

Monday, March 2, 2020

CarolMarie's new engine

CarolMarie has a new heart

Over the summer we pulled the CarolMarie out here in San Diego and gave her a new heart. 

First thanks to the fellows at A-Dock in Chula Vista Marina we got out the old engine.  

Old Engine going out

Once the engine was out we painted the engine bay bright white.


Then the new BetaMarine came in, with muffler, transmission, control panel, water heater, and lift mounts.


The new engine needed a new shaft and while she was out a new bottom job.

New shaft being sized

Preparing the new bottom

New Bottom Added

New Bottom Added

Finally the new engine installed with the new control panel.


Monday, August 6, 2018

Been putting a lot of work into her not much sailing or writing....

The Ocean Institute at Dana Point every year throws an incredible event called the  Tall Ship's Festival (https://www.ocean-institute.org/post/tall-ships-festival-presented-toshiba).  The festival includes cannon battles, parades of ships, mermaids, concerts, sails & ales and a host of other things.

The wonderful and beautiful first mate waited in line for a slip for us six months ago, getting the best slip in the event.  With all that pressure we wanted the Carolmarie to look her best for the September event.  First we pulled off all the stantions.   


And then began sanding the caprail in preparation for another three coats of Bristol Epoxy.


Thank god for Katie and Uncle Keni, the two of them went at it for three days, sanding, varnishing, rinse and repeat.

I worked on embedding the chainplates again, they'd leaked coming down the coast.


We finished off the varnish on the side boards with polysulfide chalk between the boards and the hull to set them off a bit.


We cleaned the fenders, finished the interior cockpit varnishing, and cleaned her up.


Now looking back from the day I bought her until now she's has really transformed.


Tuesday, January 2, 2018

Boat Steps and Boat Boxes

I have held off as long as I could about getting a set of steps for the boat.  I finally went looking for some on the web.  I wanted something that would complement the CarolMarie's teak trim and yet not drop the price of a dinghy on it.

I found lots of teak steps which were very pricey, but nothing that would satisfy what I needed.

Having no luck after nights of searching, I turned to my own design skills to see if I could hack a nice set together.


I found these 24 inch garden boxes from Signature Hardware called: HOLLEY 24" TEAK OUTDOOR STORAGE BOX.  I went about the design process to show how to cut them down into the proper shape.

Design of the steps using the outdoor storage boxes.

The idea was to get two of these boxes and cut the first down to make the lower step.  with a 10"platform a 10" rise seem to suit just fine.  The top of the first step was screwed to the four posts of the box because there was no need to open it.

The next step was a visual mock up to see if it fit.

Visual mockup of the cut pieces.


Happy with the design and sketch i ordered two boxes to be delivered to my uncle Keni's place in Chula Vista.  Uncle Keni is a great woodworker and had the whole think cut down and varnished in a two week period.  To make the teak look a little more realistic Keni caulked the gaps in the top of the box making it look like a ship's deck.

Seeing the final product I couldn't believe it might not get stolen so we stuck our boat name on it.

Steps in place

Named steps

Showing off the inside.

Once that was complete we decided to add a deck box in the same way.  Again I when back to Signature Hardware and found a good fit.  This time we used the 3 ft Terrel Natural Teak Storage Box, as the basis for the deck box.  This is the box as it came from Signature Hardware.

Original box from Signature Hardware

The next step was to make it water tight, not water proof.  I purchased 1/8" plywood with a birch veneer to line the inside of the box between the panels. Before the panels of the box were assembled, (they come from the vendor knocked down flat), each segment was treated with 2-part epoxy urethane.

Epoxy treated panel
Next each of the inner inserts were treated with the same 2-part epoxy after being cut to size.  These inserts were with screwed with brass screws or glued into place.  The effect was a 3-D teak and holly appearance from the box slats.

Insert epoxied and ready for assembly
The top of the box was treated in the same way as the stairs using a black deck caulk to seal it, then adding the epoxy on top of it.  Once this was done of course the boat's name and logo were added.


Top of the box ready for assembly
With the top of the box completed the entire thing was assembled and the final touch ups of the epoxy done.

Final touch ups complete after assembly.

The last step was to add the locker hasp.  A brass one was ordered off the internet and fit nicely with the gold offset lettering of the boats name.


Hasp added to lock her up.

When we put her on the deck, the dinghy fit snuggly inside, the old girl looked sharp.

Deck box mounted with dinghy inside.