The first step was to label all the hose and then figure out how all this works.
 |
| Hoses all labeled |
Once I labeled all the components of the sanitation system, I created a diagram of the system to ensure I would get the right parts, and know how it all works later.
 |
| Diagram of the sanitation system. |
To show the damage to the holding tank you can see the evidence in the photo below.
 |
| Leakage down the hoses |
 |
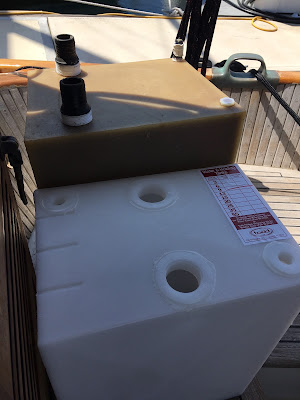
| Old and tank side by side |
My good friend who is my wive's uncle, Keni came by to help. With the old tank out we did test fits with the new tank. Everything seemed to reach without having to add new hoses. We pulled the tank out and went back to the cockpit to assembly everything.
Keni brought along his electric drill and bit, so we could mark the location of the hole for the tank's gage. A 1.25" diameter hole was drilled out in the top of the tank, then the flanges and plugs were added. The new flanges had sharper rising spurs then the old tank did.
Once the tank was back in it's spot, the new spurs made putting the hoses on a bit of a challenge. Keni rose to the occasion, being much smaller then I jump onto the tank and pulled the hoses in.
Hoses on and double clamped onto the flanges, the next step was to install the tank level gage. The gage has four self-tapping screws which secure it to the top of the tank. Before mounting it we coated the bottom of it with a thin layer of 3M 5200 chalk it and the screw holes to prevent leakage as well as seal in the odors.
 |
| Tank Level Gage in Place |
Once the gage was installed we connected the air hose, and installed the restrains. I added lemon deodorizer to toilet and flushed it eight to ten times to fill the tank 1/2 way. Watching the hoses for the next two hours for leaks was the worst part - there were none. Now sealed up, we're happy to say the cabin smells a lot better.

No comments:
Post a Comment